We’ve all been there. You quote a job for natural stone, and suddenly you’re dealing with structural concerns, moisture issues, and a timeline that keeps slipping because the material is heavy and slow to cut.
That’s why, over the last two years, I’ve switched almost exclusively to PU Stone Panels for commercial facades and high-end residential feature walls.
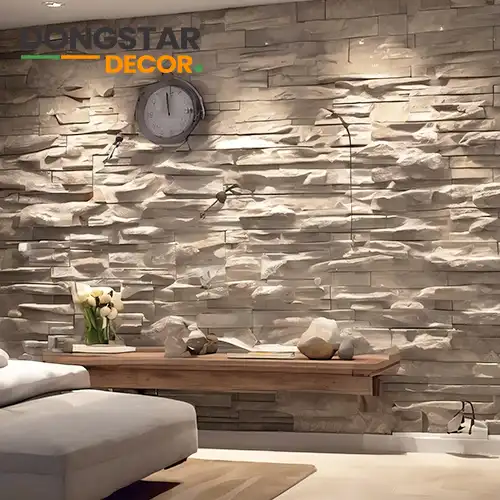
If you haven’t used them yet, PU Stone Panels (Polyurethane stone veneer) are the lightweight alternative to natural rock that still gives that high-end geological texture. They are shockingly durable, waterproof, and because they aren’t heavy, they totally change how you approach the installation.
Here is the no-fluff, project-manager-approved method for installing them on walls.
Why PU Stone is Different (And Why It Saves You Money)
Before we slap on the adhesive, you need to understand the substrate requirements. Unlike real stone, which needs beefy footings and metal lath, PU Stone Panels are lightweight. This means:
- Less Labor: You don’t need a crew of four to lift them.
- Faster Cutting: A fine-tooth blade on a circular saw or even a sharp utility knife works.
- No Movement Joints (Usually): Because they are synthetic, they handle thermal expansion better than brittle stone.
However, because they are lighter, the bond is everything. You aren’t relying on gravity as much; you are relying on the adhesive.
Step 1: The "Bad" Substrate Check
I know everyone skips this, but don’t. PU Stone Panels are waterproof, but the wall behind them needs to breathe or be properly sealed.
- Flatness: These panels are rigid. If your wall is bowed, you will see the bow. Run a straight edge over your sheathing or concrete. If you have gaps larger than 1/4 inch, you need to shim or fur out the wall.
- Moisture: If you are installing over exterior sheathing, you need a proper weather-resistant barrier (WRB) behind it. If you are going over concrete, make sure it’s cured and free of efflorescence.
Step 2: The Layout (The "No Regrets" Phase)
Don’t just start slapping panels on from the bottom corner. That is how you end up with a tiny sliver cut at the end of the wall that looks terrible.
- Snap a Level Line: Start from the highest point of the floor or grade. Measure up the height of one panel, minus about 1/2 inch for expansion if it’s an exterior application. Snap a chalk line perfectly level across the entire wall.
- Dry Lay: If you have the space, lay the first row of panels on the ground. Mix the boxes. PU Stone Panels are molded, so you will get slight color and texture variations between boxes. Mixing them now saves you from having a “striped” look later.
Step 3: Cutting and Shaping
This is where PU Stone Panels beat natural stone every time.
For straight cuts: Use a miter saw with a carbide-tipped blade (the same blade you use for trim). It cuts through these like butter.
For weird angles or outlets: Use a sharp utility knife. Score the front face deep, then snap the panel like drywall. The foam core snaps cleanly.
Pro Tip: If you get a jagged edge, you can literally sand it with 80-grit sandpaper to shape it. Try doing that to granite.
Step 4: Bonding (The Adhesive Debate)
Forget thinset mortar. Unless you are troweling the wall and back-buttering (which you can), the easiest method for PU Stone Panels is construction adhesive.
I use PL Premium or a similar polyurethane-based construction adhesive.
- For Flat Surfaces: Run a continuous 3/8-inch bead around the perimeter of the panel and one “S” shape in the center.
- For Uneven Surfaces: You might need a two-part epoxy or a mechanical fastener.
Note: If you are doing a steam shower or a constantly wet interior, use a manufacturer-recommended mortar. But for 90% of accent walls and exterior facades, adhesive is faster and holds instantly.
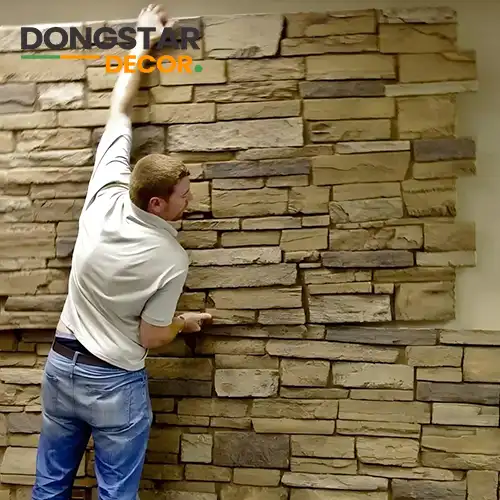
Step 5: Installation
Press the panel onto the wall. Give it a twist. The adhesive needs to make full contact.
Here is the trick to making it look real: Offset your seams. Don’t let the vertical lines line up from row to row. You want it to look like a random stone wall, not a brick pattern.
Use a level every three panels. Because these are lightweight, they can drift slightly as the adhesive sets. If one is sinking, pop it off, add more glue, and reset it.
Step 6: Corners (The Deal Breaker)
The worst part of installing flat stone veneer is the corners. Mitering stone is a pain.
Most good PU Stone Panels come with corner pieces.
- Inside Corners: Butt the panels together tightly.
- Outside Corners: Use the specific corner blocks. If you try to fold a flat panel around a corner, you will crack the “stone” texture. Always cut the flat panel back to the corner edge and apply the corner piece over the seam.
Final Walkthrough
Let the adhesive cure for 24 hours. PU Stone Panels don’t usually need sealing, but if they are in a high-traffic area where people might touch them, you can wipe them down with a damp cloth immediately. Dust from the job site settles in the grooves.
If you have a customer worried about the longevity, remind them: this is the same material used on high-end movie sets and water parks. It doesn’t rot, it doesn’t fade quickly, and it weighs nothing. That means your steel structure doesn’t have to be over-engineered, and your crew goes home earlier.