

How to Import Indoor WPC Wall Panels from China?
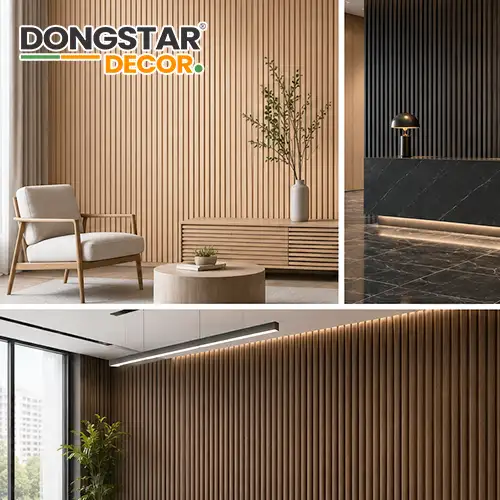
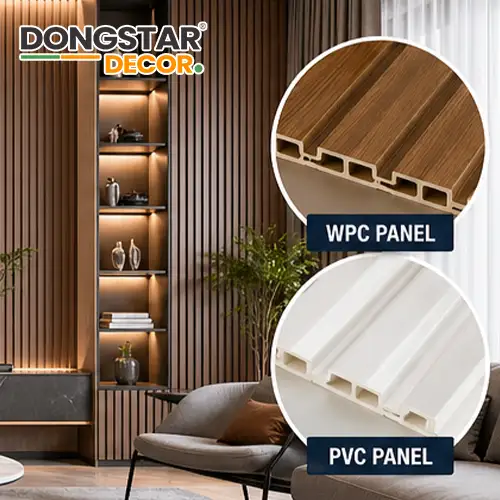
China has become the world’s largest manufacturing hub for decorative building materials, and the demand for Indoor WPC Wall Panel products continues to rise rapidly across Europe, North America, Australia, and the Middle East.For project contractors, wholesalers, distributors, and developers, importing directly from China can significantly reduce procurement costs while improving product selection and customization opportunities.But importing successfully is not only about finding the lowest price.Many buyers lose money because of: Poor supplier selection Unstable quality Shipping delays Incorrect certifications Hidden logistics costs This guide explains how experienced buyers import WPC wall panel indoor products from China efficiently, safely, and profitably in 2026. Why Global Buyers Import WPC Wall Panels from China China dominates the global WPC interior wall panels supply chain because manufacturers offer: Competitive factory pricing Large production capacity OEM/ODM customization Faster product development Diverse designs and finishes Compared with local sourcing in Europe or North America, importing from China can reduce purchasing costs by 20%–40% for bulk orders.For wholesalers and project contractors, this creates stronger profit margins and more competitive project bidding opportunities. What Is an Indoor WPC Wall Panel? An Indoor WPC Wall Panel is a decorative wall material made from wood fiber and thermoplastic materials.It combines: The natural appearance of wood The durability of engineered composite materials Moisture resistance Easier maintenance Modern WPC panels are widely used in: Hotels Offices Retail stores Apartments Villas Commercial interiors The strongest demand currently comes from: Fluted wall panels Slatted acoustic panels Marble texture WPC panels Large-format seamless panels Step-by-Step Guide to Importing Indoor WPC Wall Panels from China Step 1: Understand Your Market Demand Before contacting suppliers, define: Your target customer segment Preferred designs Local building standards Popular color trends For Europe and North America, current high-demand products include: Oak slatted panels Matte walnut finishes Acoustic WPC wall systems Black fluted panels Understanding demand first helps avoid slow-moving inventory. Step 2: Find Reliable WPC Wall Panel Manufacturers This is the most important step.A reliable supplier should provide: Stable quality Export experience Strong production capacity Professional documentation support Where to Find Suppliers 1. Google Search Search keywords like: Indoor WPC Wall Panel manufacturer WPC wall panel indoor supplier wholesale WPC interior wall panels 2. Trade Shows Popular exhibitions: Canton Fair CIFF Guangzhou BIG 5 Dubai 3. Industry Websites Professional company websites are usually more reliable than marketplace-only suppliers. Step 3: Verify Factory Capability Never rely only on product photos.Request: Factory videos Production line photos Export certifications Test reports Real project cases Reliable factories usually have: Automated extrusion lines Professional QC systems Dedicated export departments Step 4: Check Certifications Carefully For developed countries, certifications are critical. Common Certifications Buyers Request Market Common Requirements Europe CE, Fire Rating USA ASTM, VOC Testing UK Fire Safety Compliance Australia Environmental Compliance Without proper certification, customs clearance or project approval may fail. Step 5: Request Samples Before Bulk Orders Professional importers never skip sample testing.Evaluate: Surface quality Color consistency Installation structure Edge finishing Packaging quality Many experienced buyers also perform: Water resistance tests Fire tests Impact tests Step 6: Understand MOQ and Pricing Typical MOQ Product Type MOQ Standard Panels 100–300 sqm Customized Colors 500–1000 sqm Average Price Range in 2026 Product Type Price Range Standard WPC Panels $8–$20/m² Acoustic Panels $18–$40/m² Premium Marble Texture Panels $20–$45/m² Prices depend on: Surface finish Material density Fire resistance level Packaging requirements Step 7: Confirm Shipping Terms Most Common Trade Terms FOB (Free on Board) Buyer arranges shipping. CIF (Cost Insurance Freight) Supplier arranges shipping to destination port.Most experienced importers prefer FOB for better logistics control. Step 8: Choose the Right Shipping Method Sea Freight Best for: Container orders Lower transportation cost Air Freight Suitable for: Samples Urgent replacement orders For large-volume imports, sea freight remains the most economical option. Step 9: Inspect Goods Before Shipment A third-party inspection helps avoid serious losses.Inspection should verify: Quantity Packaging Surface quality Color consistency Carton labeling Skipping inspection is one of the most common importer mistakes. Step 10: Build Long-Term Supplier Relationships The best pricing and priority production often go to long-term buyers.Stable partnerships help with: Better payment terms Faster production Product customization Market-exclusive designs Most Popular Indoor WPC Wall Panel Styles in 2026 1. Slatted Oak Panels Strong demand in Europe and North America. 2. Acoustic WPC Wall Panels Growing rapidly in office and hospitality sectors. 3. Marble Texture Panels Luxury appearance with easier installation. 4. Black Fluted Panels High-margin product category for commercial interiors. Common Import Problems Buyers Face 1. Inconsistent Product Quality Different batches may have different colors or finishes. 2. Delayed Shipping Peak season congestion affects delivery schedules. 3. Poor Packaging Weak packaging can cause edge damage during transport. 4. Fake Certifications Always verify testing documents carefully. How to Reduce Import Risks Experienced importers usually: Start with trial orders Use third-party inspections Verify certifications directly Avoid extremely low-price suppliers The cheapest supplier is rarely the safest choice. FAQs 1. Is importing Indoor WPC Wall Panels from China profitable? Yes. Most wholesalers and contractors achieve significantly lower procurement costs compared with local sourcing. 2. What is the best shipping method? Sea freight is usually the most cost-effective for bulk imports. 3. How do I verify a WPC supplier in China? Request factory audits, certifications, videos, and project references. 4. Are WPC interior wall panels waterproof? Yes, high-quality WPC panels offer strong moisture resistance. 5. What are the best-selling WPC panel styles in Europe? Oak slatted panels, black fluted designs, and acoustic wall systems. 6. How long does production usually take? Typically 15–30 days depending on order size and customization. Conclusion Importing Indoor WPC Wall Panel products from China can create major opportunities for wholesalers, importers, and project contractors — but success depends on choosing the right supplier and controlling quality carefully.The strongest-performing importers in 2026 focus on: Premium product positioning Stable supplier partnerships Certification compliance Trending European designs As global demand for WPC wall panel indoor solutions continues growing, buyers who build reliable supply chains early will gain significant competitive advantages. Related Articles