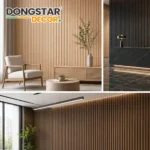
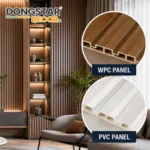
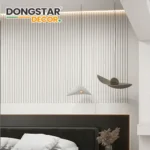
Installing Interior WPC (Wood Plastic Composite) Wall Panels is a straightforward process, making them an excellent choice for home and commercial interior décor. Here’s a step-by-step guide to ensure proper installation:
Tools & Materials Required:
WPC wall panels,Measuring tape,Level,Marker or pencil,Electric drill & screws,Wall plugs (if needed),Adhesive or glue (optional),Nail gun (if required),Cutting saw or utility knife,Aluminum or PVC trims (for edges/corners)

Step-by-Step Installation Guide:
Step 1: Surface Preparation
Ensure the wall surface is clean, dry, and smooth.
If installing over an uneven surface, consider using wooden battens or furring strips for support.
Step 2: Measuring & Cutting
Use a measuring tape to mark the dimensions of the wall.
Cut the WPC panels to the required size using a cutting saw.
Leave a 5-10mm expansion gap around the edges for thermal expansion.
Step 3: Fixing the Battens (If Needed)
If installing on an uneven wall, fix wooden or aluminum battens vertically at 400mm to 600mm spacing.
Secure the battens with screws and wall plugs.
Step 4: Installing the First Panel
Start from one corner and align the first panel properly.
Secure the panel using one of the following methods:
Adhesive/Glue Method: Apply high-strength construction adhesive to the back of the panel and press it firmly onto the wall.
Nail Gun or Screw Fixing: Drill pilot holes and screw the panels into the battens or directly onto the wall.
Step 5: Installing Subsequent Panels
Interlocking System: Most WPC panels come with a tongue-and-groove interlocking system. Insert the next panel into the groove of the first panel for a seamless fit.
Continue fixing each panel using adhesive or screws.
Step 6: Edge & Corner Finishing
Use L-trims, U-trims, or corner profiles to give the panel edges a neat finish.
Secure trims with adhesive or nails.
Step 7: Final Checks & Cleaning
Ensure all panels are properly aligned.
Wipe off any excess adhesive and clean the panels with a damp cloth.
Tips for a Perfect Installation:
Always use a level to ensure straight alignment.
Leave a gap for expansion to prevent warping.
Use moisture-resistant adhesives in high-humidity areas.
For ceilings, use lightweight panels and ensure strong fixing.
Consider professional installation for large areas or complex designs.

Following these steps, your Interior WPC Wall Panels will be installed efficiently and securely, giving a modern and stylish finish to your space!