Table of Contents
UV marble sheets are transforming interior design with their elegant look and seamless finish. Whether you’re a contractor upgrading a hotel lobby or a designer specifying feature walls, understanding how to cut and install UV marble sheets properly makes all the difference between a stunning installation and an expensive mistake. This guide walks you through every step — from tools and cutting techniques to installation best practices and safety tips.
What Are UV Marble Sheets?
UV marble sheets are ultra-thin, decorative panels made with UV-printed patterns that mimic real marble. They’re extremely popular in commercial and residential projects because they combine:
- Visual depth and realism
- Lightweight and easy handling
- Durable surface that resists fading
Unlike traditional marble slabs, these sheets are streamlined for quick installation without heavy structural support.
Essential Tools You’ll Need
Before you begin, prepare the right tools:
- Measuring tape & straightedge – get precise cuts
- Pencil / chalk line – for clean markings
- Diamond blade circular saw – smooth, dust-free cuts
- Clamps and sawhorses – secure panels while cutting
- Notched trowel – for adhesive spreading
- Fast-set adhesive – holds panels firmly
- Level – ensures perfectly plumb walls
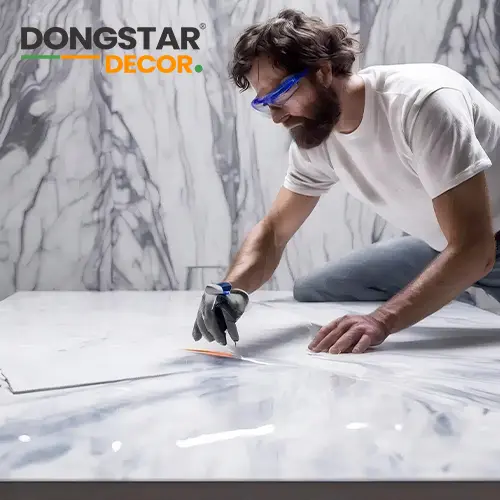
- Safety gear – goggles, gloves, ear protection
Pro Tip: Use a high-quality diamond blade designed for engineered stone to reduce chipping and overheating.
How to Measure & Mark Sheets
Measuring is vital. Take these steps:
- Measure wall height and width. Double-check before cutting.
- Draw cut lines clearly on the back of the UV marble sheet.
- Use a straightedge to keep lines accurate.
- Always allow a small gap (2–3 mm) around edges for expansion.
Accurate layout speeds up installation and prevents costly re-cuts.
How to Cut UV Marble Sheets Without Damage
Cutting large sheets can be intimidating, but done right, it’s clean and controlled:
Best method:
- Set the sheet flat on a stable surface
- Secure with clamps to prevent movement
- Use a diamond blade saw at low speed
Make slow, steady passes — don’t rush
Avoid jigsaw or standard blades — they often chip edges.
Recommended resource: Watch a step-by-step cutting demo (insert video link here)
Wall Preparation Before Installation
Before affixing sheets to the wall:
- Clean the surface — remove dust & debris
- Check for plumb and flatness
- Apply primer or waterproofing if needed
- Mark vertical and horizontal guides with a level
This prep ensures the first sheet sits true — and every panel after aligns perfectly.
Applying Adhesive and Installing Sheets
Apply adhesive with a notched trowel in a consistent pattern (butter and back-butter technique):
- Apply adhesive to the wall
- Also apply a thin coat to the back of the sheet
- Lift and press sheet onto the wall
- Tap lightly with a rubber mallet to seat it
- Check with a level immediately
For heavy or larger sheets, use temporary props until the adhesive sets.
Seaming and Edge Treatment
To achieve a seamless look:
- Leave a minimal gap between sheets (1-2 mm)
- Use soft sealant in corners or changes of plane
- Install finishing trims or profiles around openings
Matching grain and pattern at joins makes the installation look like one continuous surface.
Clean-Up and Aftercare
Once the sheets are installed:
- Wipe down with a damp cloth
- Avoid harsh chemicals for at least 48 hours
- Inspect joints and seals for gaps
Future maintenance is easy — a soft cleaner keeps the surface luminous without streaking.
Common Mistakes to Avoid
- Cutting without clamps
- Rushing measurements
- Using the wrong blade
- Skipping surface prep
Avoiding these pitfalls will save time, material, and frustration.
Safety Tips Every Installer Should Know
- lways wear eye protection
- Use a dust mask when cutting
- Keep hands clear of blades
- Secure panels before lifting
Safety isn’t an option — it’s a requirement on every job site.
Final Thoughts
Installing UV marble sheets for wall projects adds elegance with minimal fuss — but only if you cut and install them correctly. With the right tools, precise preparation, and careful handling, your finishes will be clean, modern, and built to last.